本文已于2023-07-06 14:25:25更新
1 MinGW编译器下载和配置
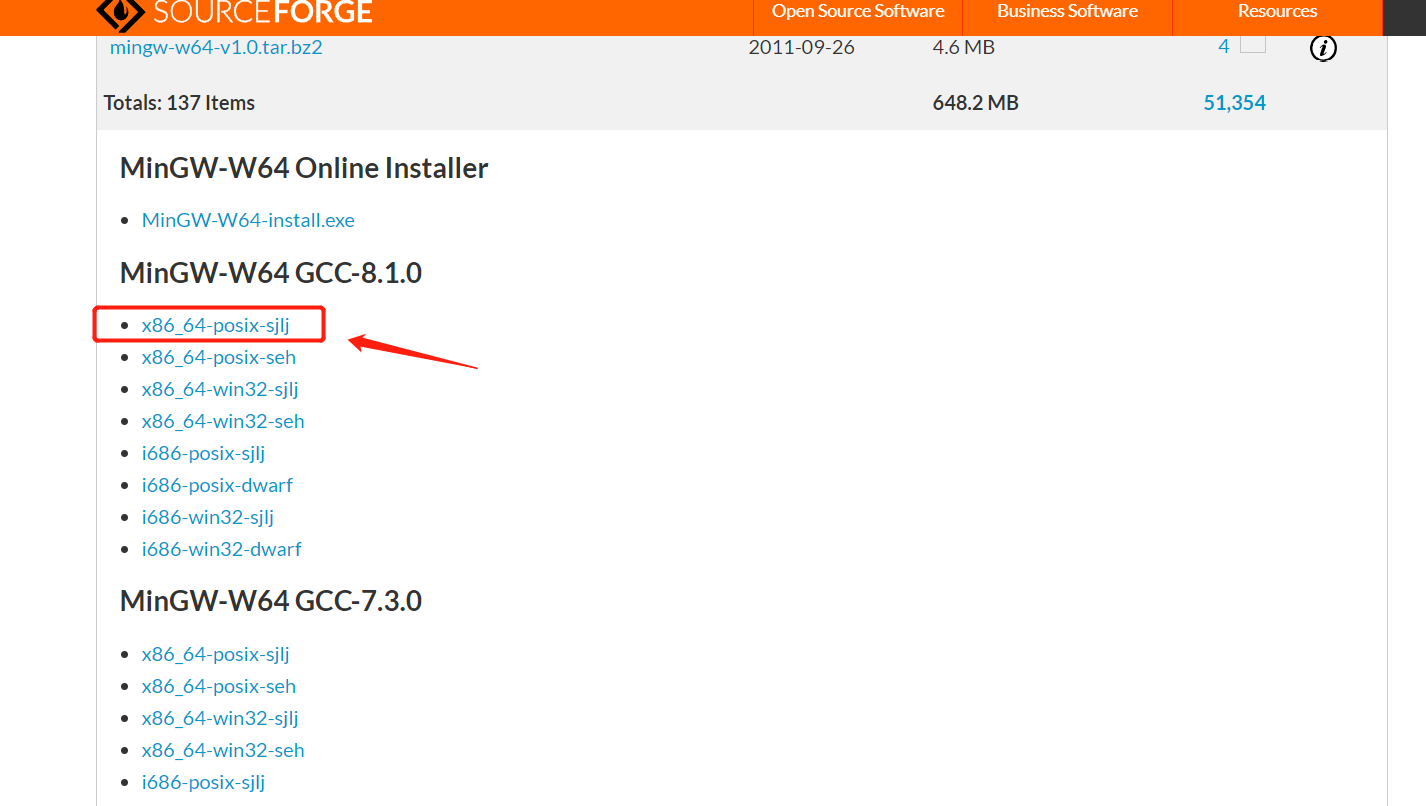
1.1 下载MinGW编译器
下载地址(下载太慢需要科学上网)
- 在线安装——下载MinGW-W64-install.exe(速度较慢)
- 下载压缩包——×86_64-posix-sjlj(速度较快)
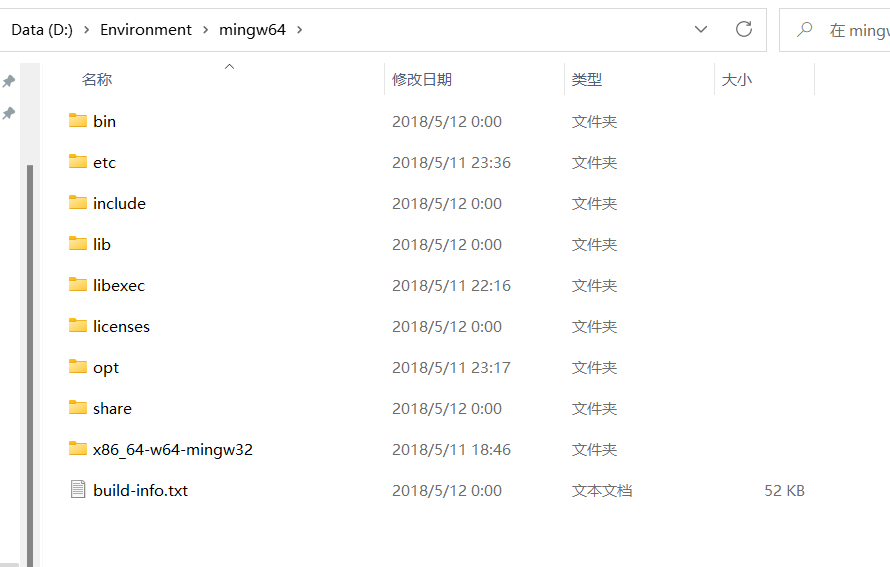
下载完成,解压后:
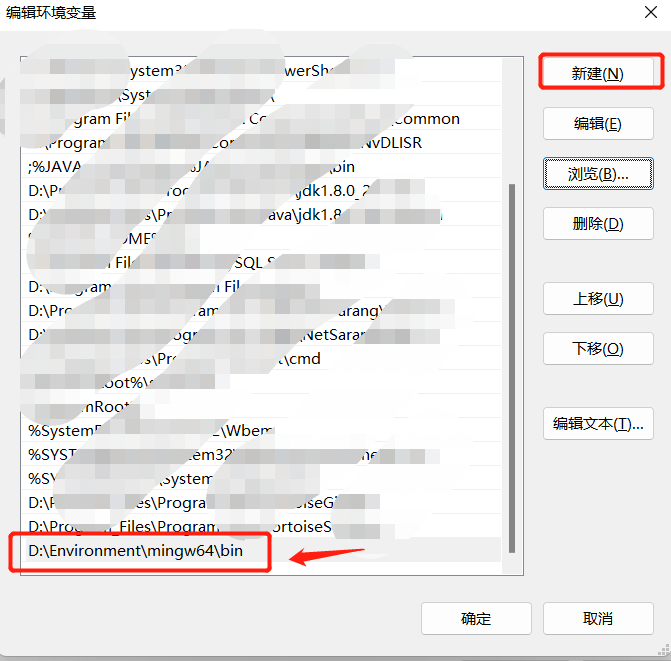
1.2 配置环境变量
Path里新建一条指向MinGW解压后的bin目录
校验是否配置成功:
cmd里输入gcc -v回车,结果如下:
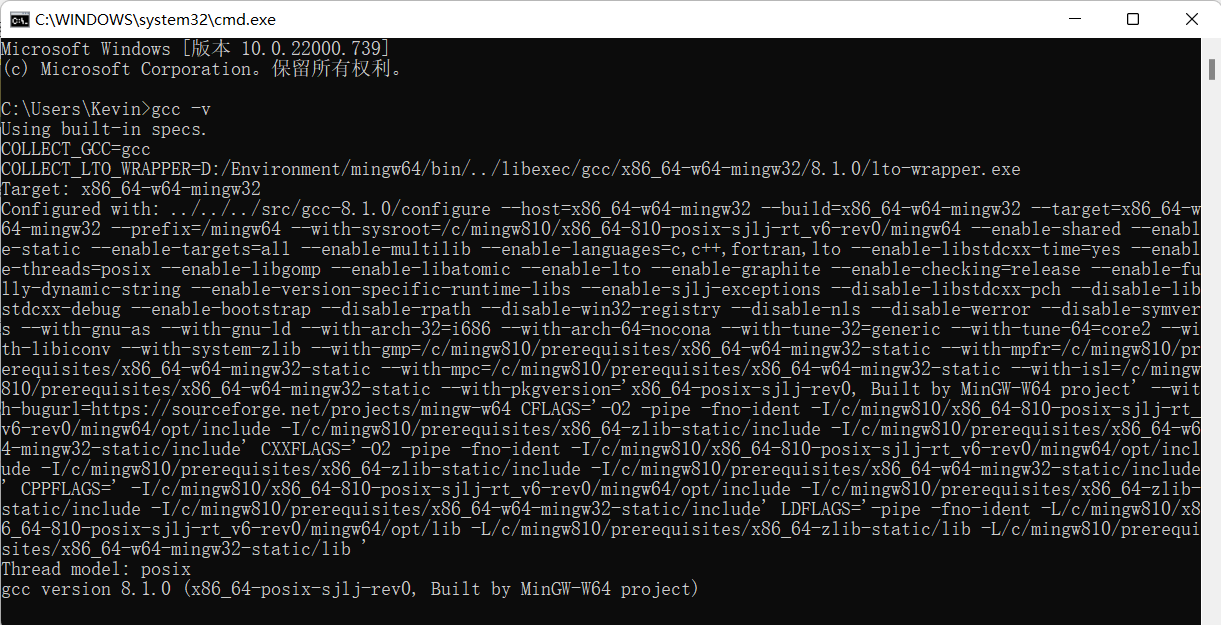
则配置成功。
2 VScode配置C/C++环境
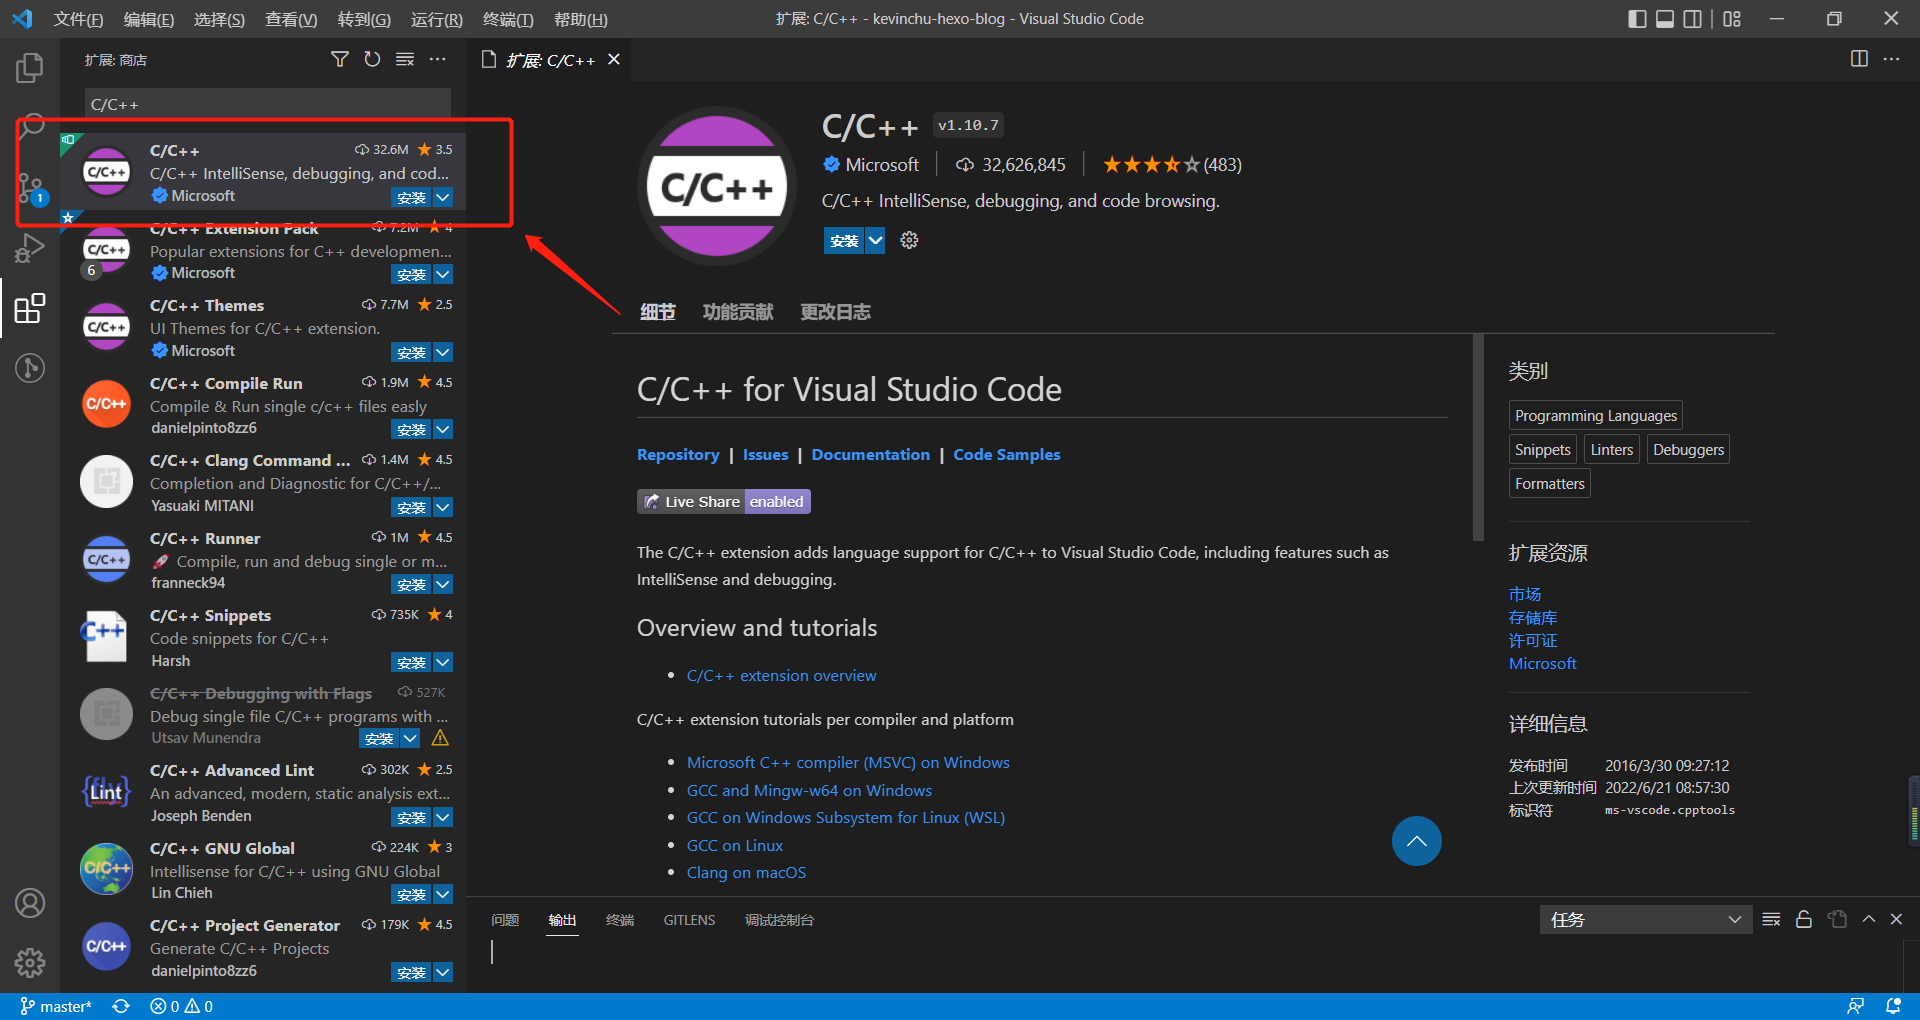
2.1 VScode安装插件
必要插件-C/C++:
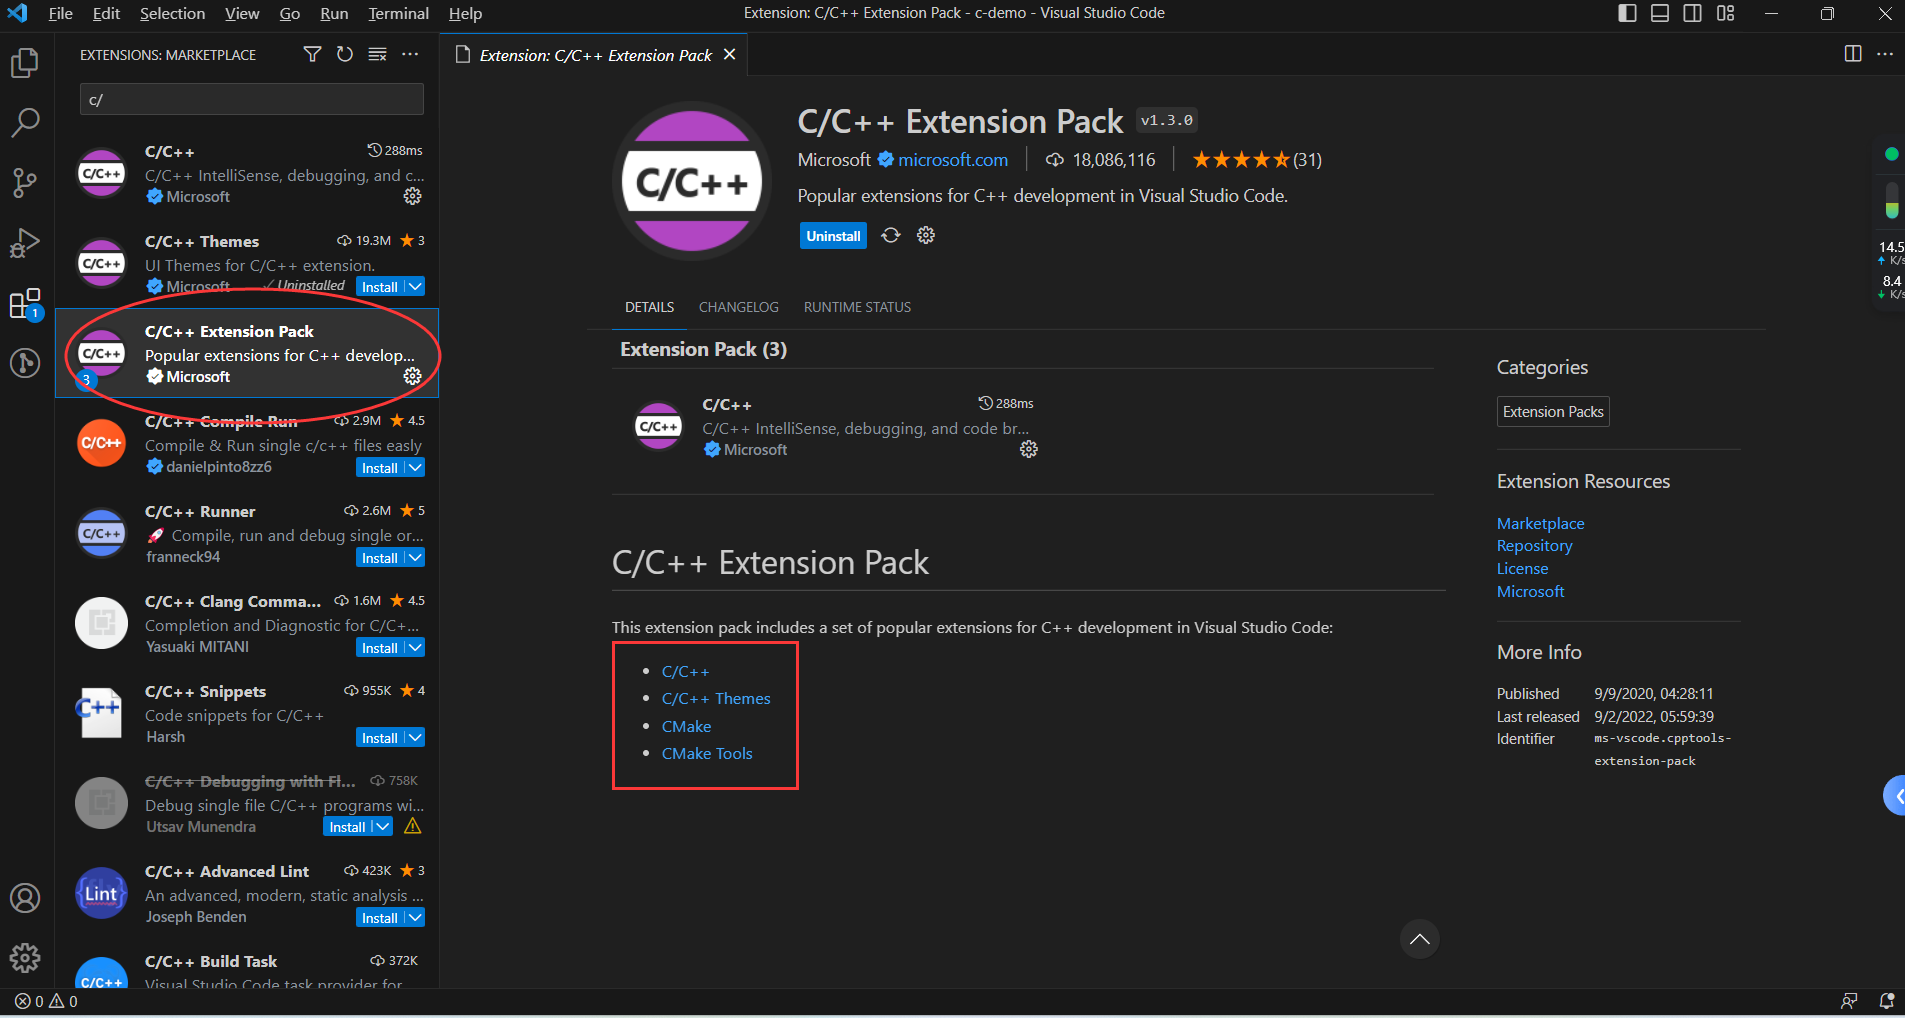
推荐-C/C++ Extension Pack:
(包含了 vscode 编写 C/C++ 工程需要的插件C/C++、C/C++ Themes、CMake、CMake Tools等)
安装完后重启VScode。
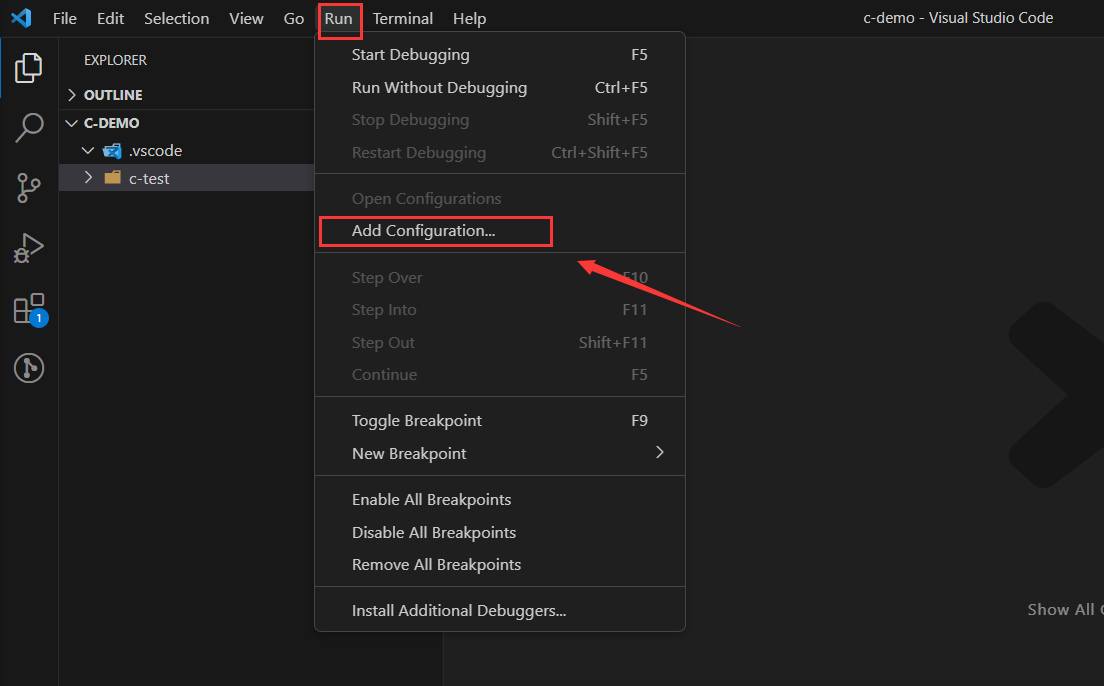
2.2 配置环境参数
launch.json: Run->Add Configuration…->任选一模板
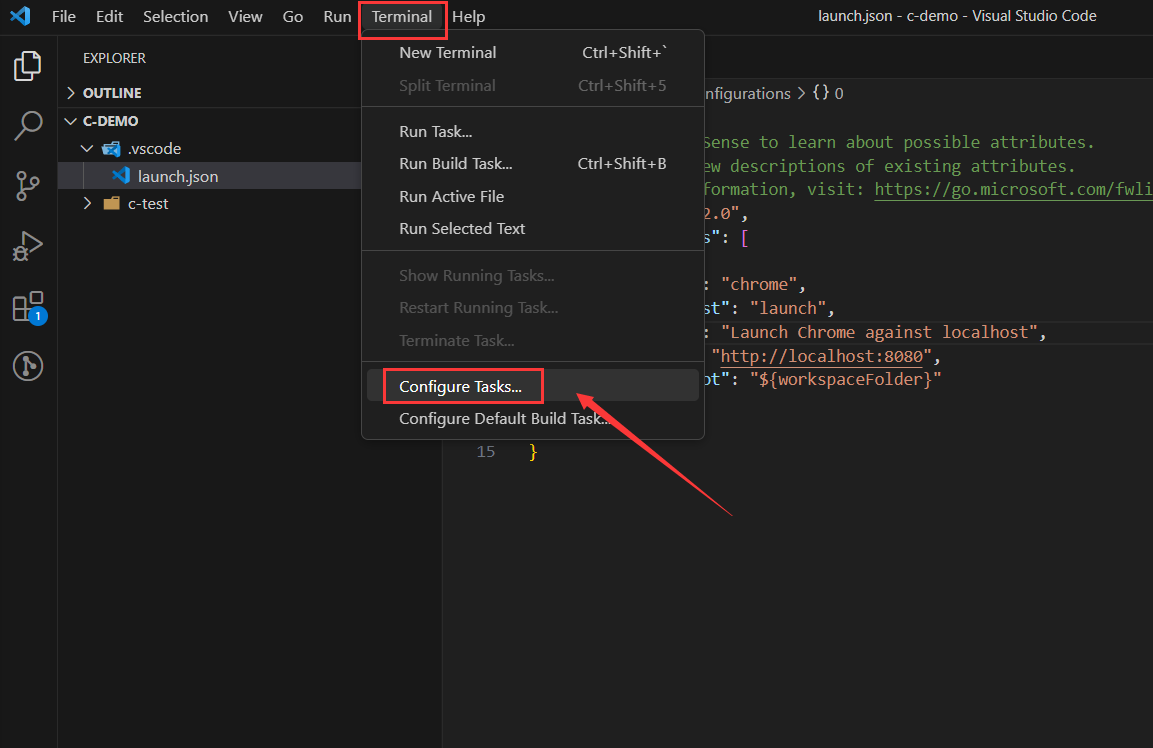
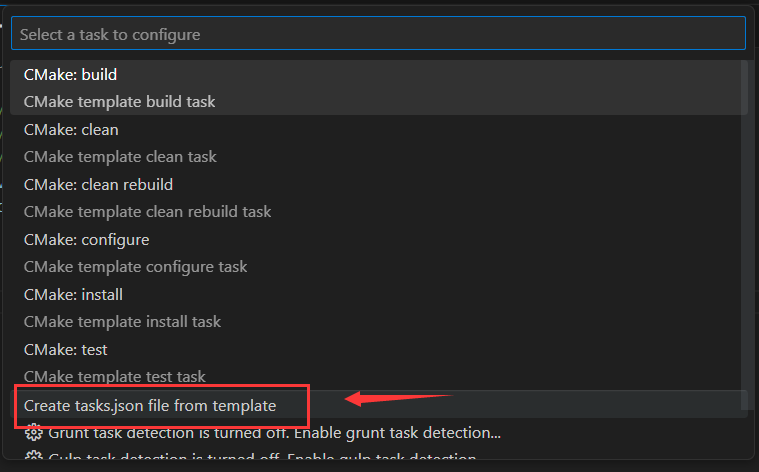
tasks.json: Terminal->Configure Tasks…->Create tasks.json file from template->任选一模板
c_cpp_properties.json: 点开项目文件下的任一文件,在vscode右下角找到Win32按钮并点击->Edit Configuration (JSON)


三个文件内容配置参考(清空默认内容,复制粘贴,修改mingw64路径):
c_cpp_properties.json
1
2
3
4
5
6
7
8
9
10
11
12
13
14
15
16
17
18
19
20
21
22
| {
"configurations": [
{
"name": "Win32",
"includePath": [
"${workspaceFolder}/**"
],
"defines": [
"_DEBUG",
"UNICODE",
"_UNICODE"
],
"windowsSdkVersion": "10.0.17763.0",
"compilerPath": "D:\\Environment\\mingw64\\bin\\g++.exe",
"cStandard": "c11",
"cppStandard": "c++17",
"intelliSenseMode": "${default}"
}
],
"version": 4
}
|
launch.json
1
2
3
4
5
6
7
8
9
10
11
12
13
14
15
16
17
18
19
20
21
22
23
24
25
26
27
28
29
| {
"version": "0.2.0",
"configurations": [
{
"name": "g++.exe build and debug active file",
"type": "cppdbg",
"request": "launch",
"program": "${fileDirname}\\${fileBasenameNoExtension}.exe",
"args": [],
"stopAtEntry": false,
"cwd": "${workspaceFolder}",
"environment": [],
"externalConsole": true,
"MIMode": "gdb",
"miDebuggerPath": "D:\\Environment\\mingw64\\bin\\gdb.exe",
"setupCommands": [
{
"description": "为 gdb 启用整齐打印",
"text": "-enable-pretty-printing",
"ignoreFailures": true
}
],
"preLaunchTask": "task g++"
}
]
}
|
tasks.json
1
2
3
4
5
6
7
8
9
10
11
12
13
14
15
16
17
18
19
20
21
22
23
24
25
26
27
28
29
| {
"version": "2.0.0",
"tasks": [
{
"type": "shell",
"label": "task g++",
"command": "D:\\Environment\\mingw64\\bin\\g++.exe",
"args": [
"-g",
"${file}",
"-o",
"${fileDirname}\\${fileBasenameNoExtension}.exe",
"-I",
"D:\\Workspace\\cpp-projects",
"-std=c++17"
],
"options": {
"cwd": "D:\\Environment\\mingw64\\bin"
},
"problemMatcher": [
"$gcc"
],
"group": "build",
}
]
}
|
3 测试运行
在搭好环境的目录下,创建hello-world项目,输入以下测试代码:
1
2
3
4
5
6
7
8
| #include <stdio.h>
#include <windows.h>
int main()
{
printf("Hello World\n");
system("pause");
return 0;
}
|
目录结构:
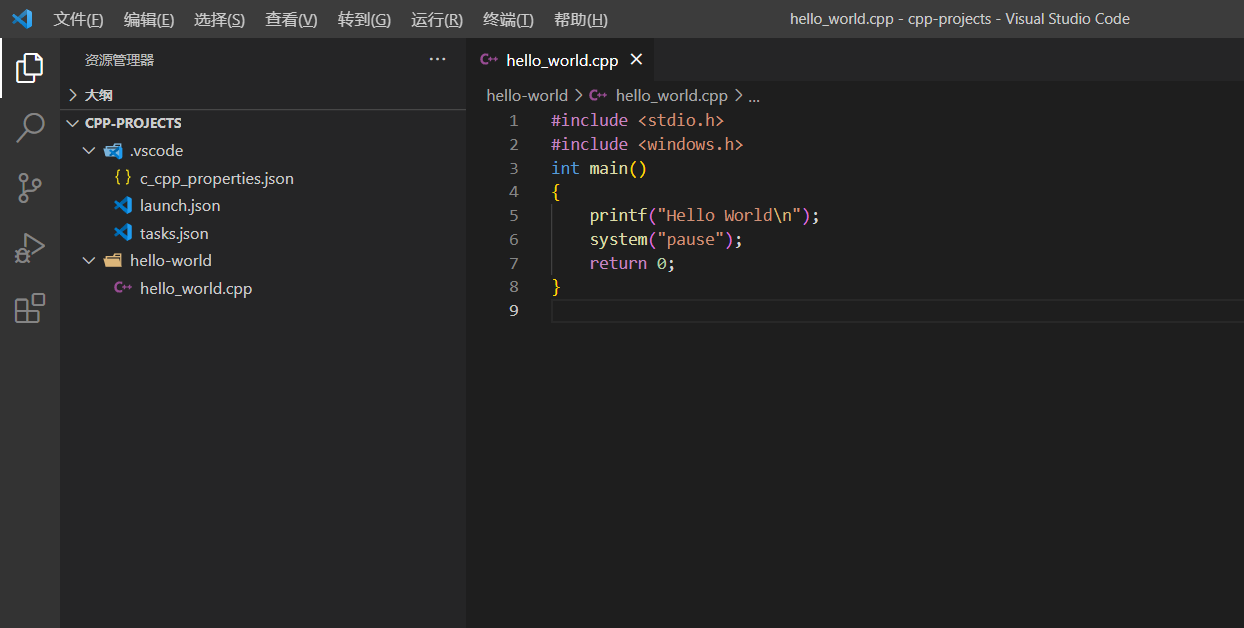
按F5运行代码hello_world.cpp:
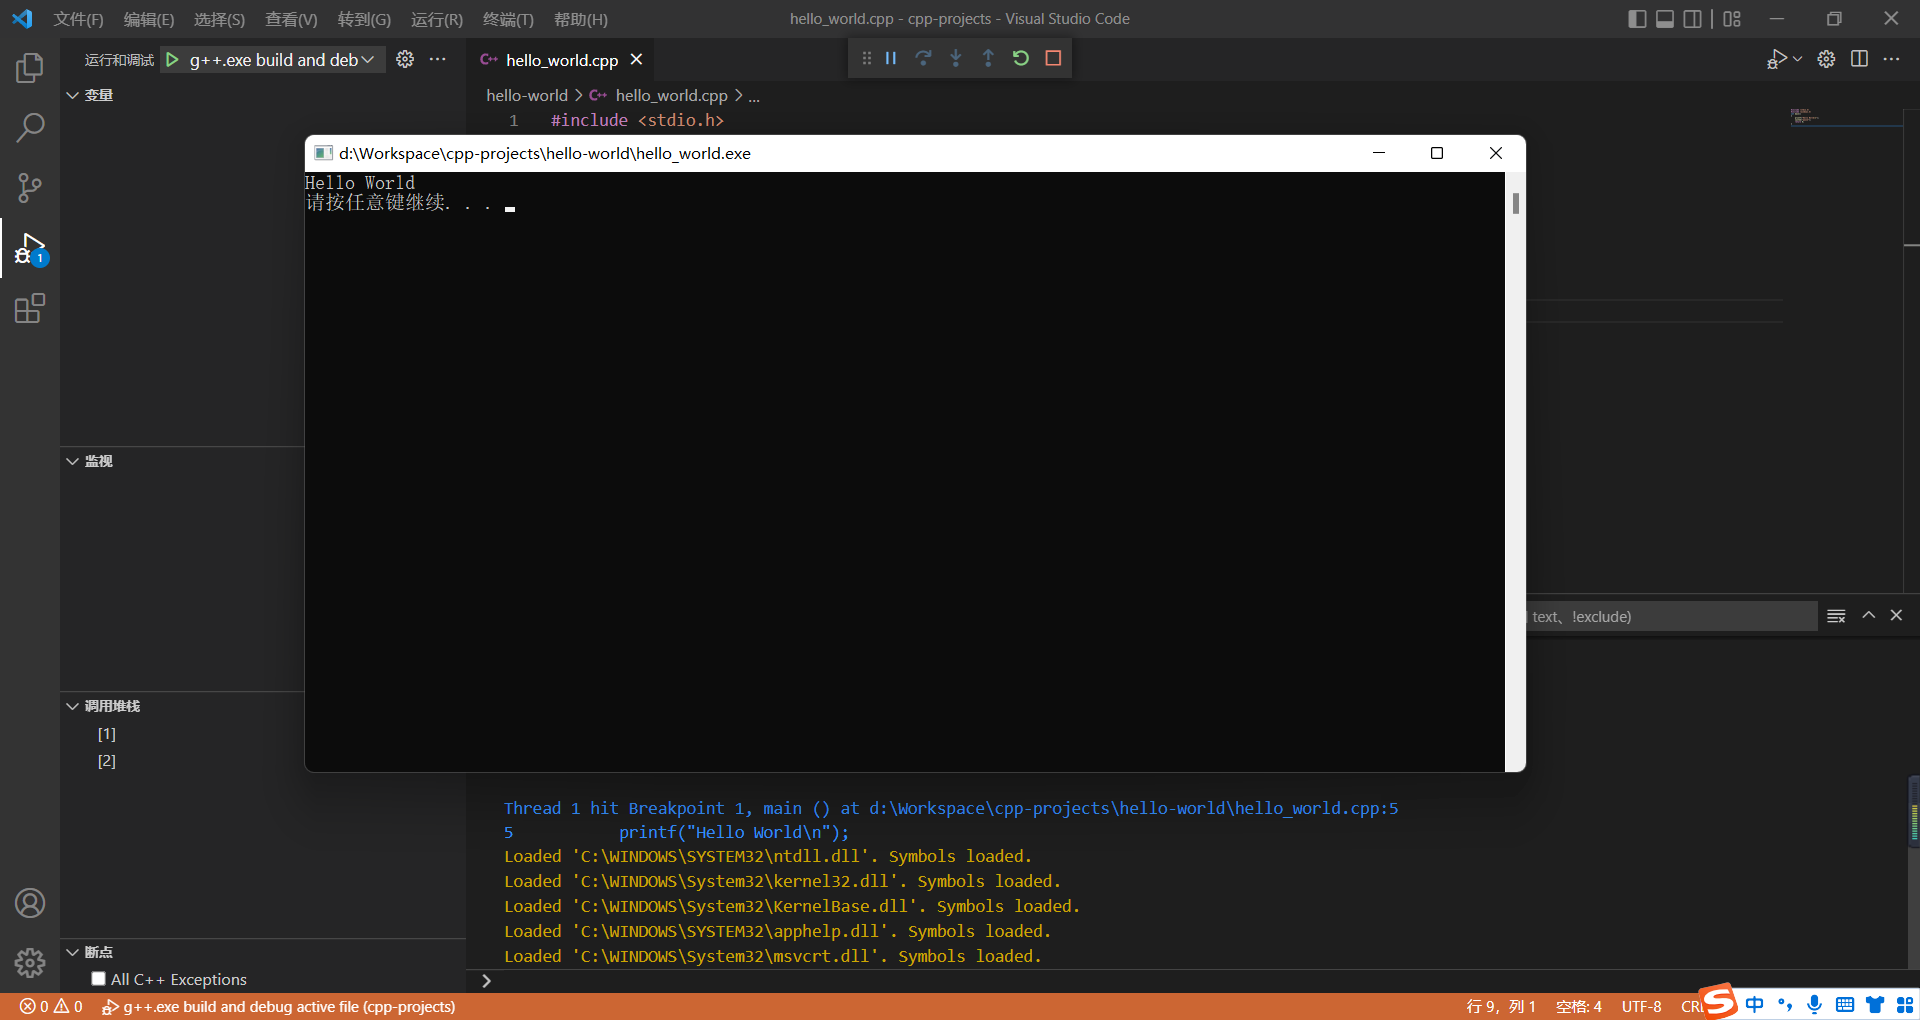
成功!
4 常见问题
- c语言程序窗口执行到scanf函数出现闪退
可在头文件加上#include,main函数里return上面加上system(“pause”); 可防止程序窗口闪退
- c++直接加system(“pause”),防止窗口闪退
本文参考自:https://blog.csdn.net/weixin_48468423/article/details/118950592