本文最后更新于 2024年5月21日 凌晨
这篇博客用于记录我对本站使用的博客主题Fluid的魔改内容,以防遗忘。部分魔改方式过于粗糙,不够优雅,参考需谨慎。
目录:
1-添加鼠标移动小星星特效
主题配置项custom_js引入stars.js
2-博客底部添加运行时间
修改themes\fluid\layout\_partials\footer.ejs,在第一行<div class="footer-inner">后面追加:
1
2
3
4
5
6
7
8
9
10
11
12
13
14
15
16
17
18
19
20
21
22
23
24
25
26
27
28
29
30
31
32
| <div>
<span id="timeDate">正在载入天数...</span>
<span id="times">载入时分秒...</span>
<script>
var now = new Date();
function createtime(){
var grt= new Date("08/17/2020 00:00:00");
now.setTime(now.getTime()+250);
days = (now - grt ) / 1000 / 60 / 60 / 24;
dnum = Math.floor(days);
hours = (now - grt ) / 1000 / 60 / 60 - (24 * dnum);
hnum = Math.floor(hours);
if(String(hnum).length ==1 ){
hnum = "0" + hnum;
}
minutes = (now - grt ) / 1000 /60 - (24 * 60 * dnum) - (60 * hnum);
mnum = Math.floor(minutes);
if(String(mnum).length ==1 ){
mnum = "0" + mnum;
}
seconds = (now - grt ) / 1000 - (24 * 60 * 60 * dnum) - (60 * 60 * hnum) - (60 * mnum);
snum = Math.round(seconds);
if(String(snum).length ==1 ){
snum = "0" + snum;
}
document.getElementById("timeDate").innerHTML = "🚀已持续航行 "+dnum+" 天";
document.getElementById("times").innerHTML = hnum + " 时 " + mnum + " 分 " + snum + " 秒";
}
setInterval("createtime()",250);
</script>
</div>
|
安装hexo-generator-feed插件:
npm install hexo-generator-feed --save
在hexo配置文件里追加配置项:
1
2
3
4
5
6
7
8
|
plugins:
hexo-generator-feed
feed:
type: atom
path: atom.xml
limit: 20
|
展示位置随意,比如放在博客底部信息里,在主题配置项footer.content里追加:
<a href="https://blog.kevinchu.top/atom.xml" target="_blank" rel="nofollow noopener"><i class="iconfont icon-rss"></i>RSS</a>
4-移动端支持显示回到顶部按钮
修改themes\fluid\source\js\events.js中的registerScrollTopArrowEvent,改为:
1
2
3
4
5
6
7
8
9
10
11
12
13
14
15
16
17
18
19
20
21
22
23
24
25
26
27
28
29
30
31
32
33
34
35
36
37
38
39
40
41
42
43
44
45
46
47
48
49
50
| function() {
var topArrow = jQuery('#scroll-top-button');
if (topArrow.length === 0) {
return;
}
var board = jQuery('#board');
if (board.length === 0) {
return;
}
var arrowUpIcon = jQuery('#scroll-top-button i');
if(arrowUpIcon.length === 0){
return;
}
var posDisplay = false;
var scrollDisplay = false;
var setTopArrowPos = function() {
var boardRight = board[0].getClientRects()[0].right;
var bodyWidth = document.body.offsetWidth;
var right = bodyWidth - boardRight;
posDisplay = right >= 50;
topArrow.css({
'bottom': scrollDisplay ? '20px' : '-60px',
'right' : posDisplay ? right - 64 : 8 + 'px',
'min-width' : posDisplay ? 40 : 28 + 'px',
'min-height' : posDisplay ? 40 : 28 + 'px'
});
arrowUpIcon.css({
'font-size' : posDisplay ? 32 : 20 + 'px'
});
};
setTopArrowPos();
jQuery(window).resize(setTopArrowPos);
var headerHeight = board.offset().top;
Fluid.utils.listenScroll(function() {
var scrollHeight = document.body.scrollTop + document.documentElement.scrollTop;
scrollDisplay = scrollHeight >= headerHeight;
topArrow.css({
'bottom': scrollDisplay ? '20px' : '-60px'
});
});
topArrow.on('click', function() {
jQuery('body,html').animate({
scrollTop: 0,
easing : 'swing'
});
});
}
|
5-导航栏标题添加霓虹灯特效
修改themes\fluid\source\css\_pages\_base\_widget\header.styl,在里面追加样式(注意缩进):
1
2
3
4
5
6
7
8
9
10
11
| .navbar-title
outline none
--c lightseagreen
text-shadow 0 0 10px var(--c),0 0 20px var(--c),0 0 40px var(--c),0 0 80px var(--c),0 0 160px var(--c)
animation animate 5s linear infinite
@keyframes animate{
to{
filter: hue-rotate(360deg)
}
}
|
然后修改themes\fluid\layout\_partials\header\navigation.ejs,
找到对应导航栏标题的标签内容:
<strong><%= theme.navbar.blog_title || config.title %></strong>
给其添加上class属性,修改为:
<strong class="navbar-title"><%= theme.navbar.blog_title || config.title %></strong>
6-导航栏添加和风天气插件(已失效,该插件已于2024年05月01日停止服务)
(⚠️现已失效!该插件产品已于2024年5月1日停止服务)
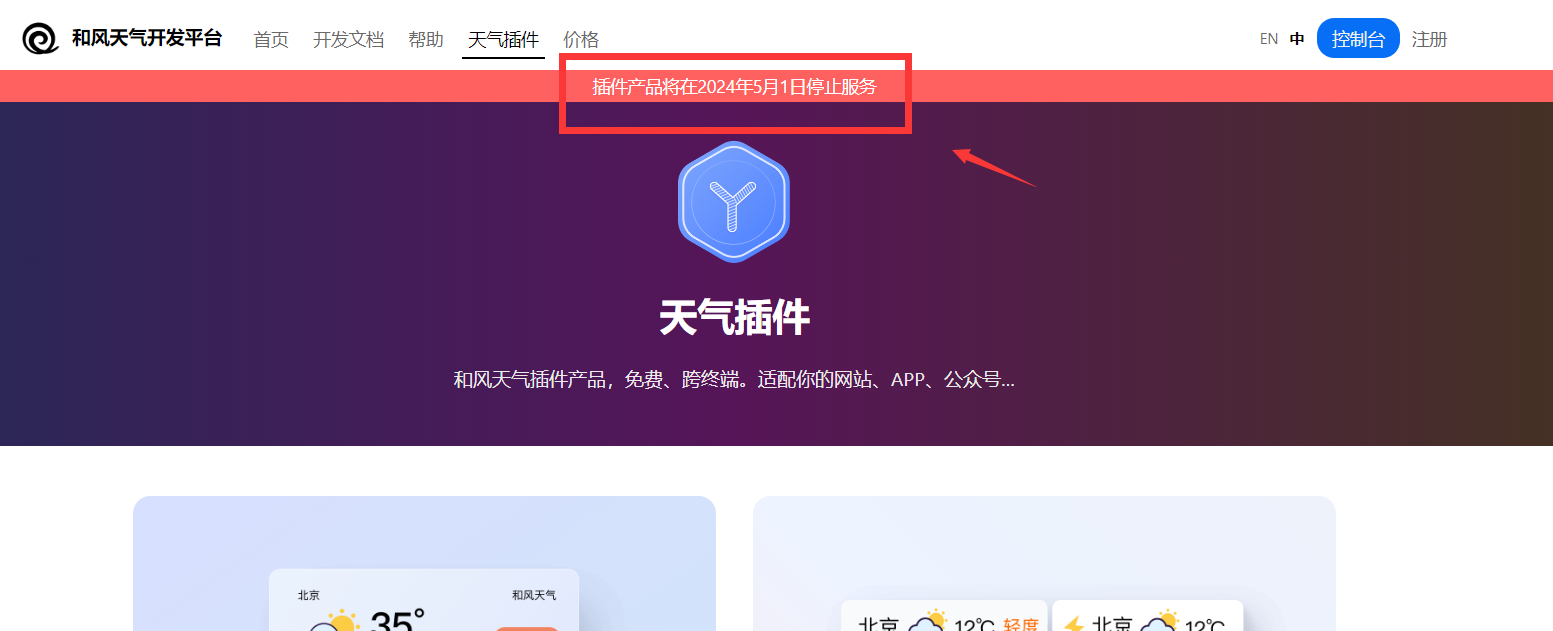
先去和风天气官网创建一个天气简约插件的代码(需要注册账号),插件样式可根据需要自定义,生成过的插件信息也可在控制台查到
然后修改themes\fluid\layout\_partials\header\navigation.ejs:
找到导航栏标题a标签(class属性为navbar-brand),在其下方添加刚刚生成的天气插件代码,同时修改下,将天气插件代码第一行的div标签用span标签包裹起来,并设置一个class属性比如weather-plugin:
1
2
3
4
5
6
7
8
9
10
11
12
13
14
15
16
17
18
19
20
21
22
23
24
25
26
| <span class="weather-plugin"><div id="he-plugin-simple"></div></span>
<script>
WIDGET = {
"CONFIG": {
"modules": "10243",
"background": "5",
"tmpColor": "FFFFFF",
"tmpSize": "16",
"cityColor": "FFFFFF",
"citySize": "16",
"aqiColor": "FFFFFF",
"aqiSize": "16",
"weatherIconSize": "24",
"alertIconSize": "18",
"padding": "10px 10px 10px 10px",
"shadow": "0",
"language": "auto",
"borderRadius": "10",
"fixed": "false",
"vertical": "top",
"horizontal": "left",
"key": "your key"
}
}
</script>
<script src="https://widget.qweather.net/simple/static/js/he-simple-common.js?v=2.0"></script>
|
修改themes\fluid\source\css\_pages\_base\_widget\header.styl,在里面追加对应的样式代码(限制可见宽度):
1
2
3
4
5
| .weather-plugin
@media (max-width: 992px)
display none
@media (min-width: 992px)
display block
|
7-替换Mac风格代码块
在主题文件themes\fluid\source\css目录下新建样式文件,如macpanel.styl,内容参考:
1
2
3
4
5
6
7
8
9
10
11
12
13
14
15
16
| .highlight
background: #21252b
border-radius: 5px
box-shadow: 0 10px 30px 0 rgba(0, 0, 0, .4)
padding-top: 30px
&::before
background: #fc625d
border-radius: 50%
box-shadow: 20px 0 #fdbc40, 40px 0 #35cd4b
content: ' '
height: 12px
left: 12px
margin-top: -20px
position: absolute
width: 12px
|
修改主题配置文件_config.fluid.yml,找到custom_css配置项,引入刚刚新建的样式文件(此处引入.styl文件无需加后缀):
1
2
| custom_css:
- /css/macpanel
|
继续修改_config.fluid.yml,找到code.highlightjs配置项,将代码高亮风格修改暗色风格(dark系列),如:
1
2
3
4
5
6
| highlightjs:
style: "github dark dimmed"
style_dark: "dark"
|
注:如果选用其他代码高亮风格,有可能会造成代码背景是偏白色的,与黑色的Mac栏不搭。
8-添加礼花打字特效
主题配置项custom_js引入typing-effect.js
9-解决移动端部分页面评论未加载完成时内部元素出现滚动条的问题
注:此修改对应fluid主题版本:1.9.5,在最新的版本中,该问题可能已经被修复。
例如:文章页面当评论加载尚未完成时,移动端就有可能短暂出现内部滚动条:
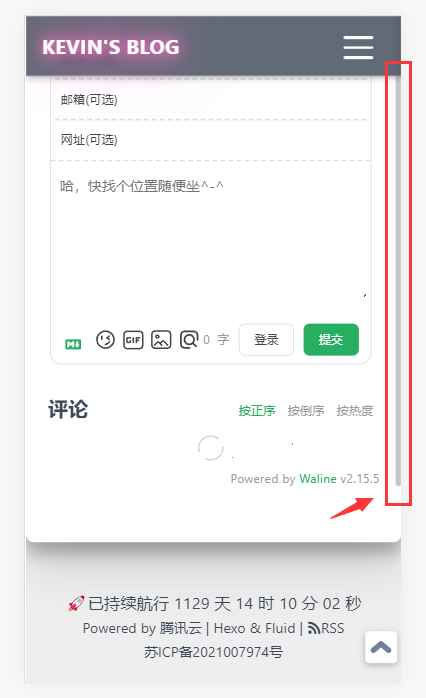
解决方法比较简单,就是找到对应出现滚动条的标签,给它加上样式overflow-y: hidden。例如,对于文章页面,可以修改themes\fluid\source\css\_pages\_post\post-page.styl文件,调整.post-content,具体修改项:
1
2
3
4
5
| .post-content, post-custom
box-sizing border-box
padding-left 10%
padding-right 10%
overflow-y hidden //加上这一行
|
10-首屏图片添加上升气泡特效
可参考这篇博客
修改themes\fluid\layout\_partials\header\banner.ejs,在<div class="full-bg-img">标签下追加代码(与其子标签<div class="mask flex-center" style="background-color: rgba(0, 0, 0, <%= parseFloat(banner_mask_alpha) %>)">标签同级):
1
2
3
4
5
6
7
8
9
10
11
12
13
14
15
16
17
18
19
20
21
22
23
24
25
26
27
28
29
30
31
32
33
34
35
36
37
38
39
40
41
42
43
44
45
46
47
48
49
50
51
52
53
54
55
56
57
58
59
60
61
62
63
64
65
66
67
68
69
70
71
72
73
74
75
76
77
78
79
80
81
82
83
84
85
86
87
88
89
90
91
92
93
94
95
96
97
98
99
100
101
102
103
104
105
106
107
108
109
110
111
112
113
114
115
116
117
118
119
120
121
122
123
124
125
126
127
128
129
130
131
| <% if(in_scope('home')) { %>
<div style="height:500px" id="bubbles"></div>
<script>
circleMagic();
function circleMagic(options) {
let width;
let height;
let canvas;
let ctx;
let animateHeader = true;
const circles = [];
const settings = options || {
color: 'rgba(255,255,255,.3)',
radius: 10,
density: 0.1,
clearOffset: 0.7
}
const container = document.getElementById('bubbles');
initContainer();
addListeners();
function initContainer() {
width = container.offsetWidth;
height = container.offsetHeight - 120;
initCanvas();
canvas = document.getElementById('homeTopCanvas');
canvas.width = width;
canvas.height = height;
canvas.style.position = 'absolute';
canvas.style.left = '0';
canvas.style.bottom = '0';
ctx = canvas.getContext('2d');
for (let x = 0; x < width * settings.density; x++) {
const c = new Circle();
circles.push(c);
}
animate();
}
function initCanvas() {
const canvasElement = document.createElement('canvas');
canvasElement.id = 'homeTopCanvas';
canvasElement.style.pointerEvents = 'none';
container.appendChild(canvasElement);
canvasElement.parentElement.style.overflow = 'hidden';
}
function addListeners() {
window.addEventListener('scroll', scrollCheck, false);
window.addEventListener('resize', resize, false);
}
function scrollCheck() {
if (document.body.scrollTop > height) {
animateHeader = false;
} else {
animateHeader = true;
}
}
function resize() {
width = container.clientWidth;
height = container.clientHeight;
container.height = height + 'px';
canvas.width = width;
canvas.height = height;
}
function animate() {
if (animateHeader) {
ctx.clearRect(0, 0, width, height);
for (const i in circles) {
circles[i].draw();
}
}
requestAnimationFrame(animate);
}
function randomColor() {
const r = Math.floor(Math.random() * 255);
const g = Math.floor(Math.random() * 255);
const b = Math.floor(Math.random() * 255);
const alpha = Math.random().toPrecision(2);
return 'rgba(' + r + ', ' + g + ', ' + b + ', ' + alpha + ')';
}
function Circle() {
const that = this;
(function () {
that.pos = {};
init();
})();
function init() {
that.pos.x = Math.random() * width;
that.pos.y = height + Math.random() * 100;
that.alpha = 0.1 + Math.random() * settings.clearOffset;
that.scale = 0.1 + Math.random() * 0.3;
that.speed = Math.random();
if (settings.color === 'random') {
that.color = randomColor();
} else {
that.color = settings.color;
}
}
this.draw = function () {
if (that.alpha <= 0) {
init();
}
that.pos.y -= that.speed;
that.alpha -= 0.0005;
ctx.beginPath();
ctx.arc(
that.pos.x,
that.pos.y,
that.scale * settings.radius,
0,
2 * Math.PI,
false
);
ctx.fillStyle = that.color;
ctx.fill();
ctx.closePath();
}
}
}
</script>
<% } %>
|
11-添加星系loading动画
灵感来源:awescnb
在themes\fluid\layout\_partials\路径下创建loading.ejs,内容参考:
1
2
3
4
5
6
7
8
9
10
11
12
13
14
15
16
17
18
19
20
21
22
23
24
25
26
27
28
29
30
31
32
33
34
35
36
37
38
39
40
41
42
43
44
45
46
47
48
49
50
51
52
53
54
55
56
57
58
59
60
61
62
63
64
65
66
67
68
69
70
71
72
73
74
75
76
77
78
79
80
81
82
83
84
85
86
87
88
89
90
91
92
93
94
95
96
97
98
99
100
101
102
103
104
105
106
107
108
109
110
111
112
113
114
115
116
117
| <%
play_time=theme.loading.play_time || 500
%>
<style type="text/css">
@keyframes spin3D {
from {
transform: rotate3d(0.5, 0.5, 0.5, 360deg);
}
to {
transform: rotate3d(0deg);
}
}
#loading {
height: 100%;
background-color: #172d4781;
backdrop-filter: saturate(100%) blur(10px);
display: flex;
justify-content: center;
align-items: center;
position: fixed;
top: 0;
left: 0;
right: 0;
overflow: hidden;
z-index: 99999999;
}
.spinner-box {
width: 300px;
height: 300px;
display: flex;
justify-content: center;
align-items: center;
background-color: transparent;
}
.leo {
position: absolute;
display: flex;
justify-content: center;
align-items: center;
border-radius: 50%;
}
.blue-orbit {
width: 175px;
height: 175px;
border: 2px solid #1a91fa;
animation: spin3D 3s linear .2s infinite;
}
.green-orbit {
width: 135px;
height: 135px;
border: 2px solid #00ffdd;
animation: spin3D 2s linear 0s infinite;
}
.red-orbit {
width: 100px;
height: 100px;
border: 2px solid #d75151;
animation: spin3D 1s linear 0s infinite;
}
.white-orbit-a {
width: 70px;
height: 70px;
border: 1px solid #faf5f5;
animation: spin3D 3s linear 0s infinite;
}
.white-orbit-b {
width: 70px;
height: 70px;
border: 1px solid #faf5f5;
animation: spin3D 1.5s linear 0s infinite;
}
.nucleus {
width: 1px;
height: 1px;
border: 1px solid #ffffff;
animation: spin3D 1s linear 0s infinite;
}
</style>
<div id="loading">
<div class="spinner-box">
<div class="blue-orbit leo"></div>
<div class="green-orbit leo"></div>
<div class="red-orbit leo"></div>
<div class="white-orbit-a leo"></div>
<div class="white-orbit-b leo"></div>
<div class="nucleus leo"></div>
</div>
</div>
<script>
(function () {
const loaded = function () {
window.onload = function () {
const loader = document.getElementById("loading");
loader.className = "fadeout";
setTimeout(function () {
loader.style.display = "none";
},
<%- play_time %>
);
}
};
loaded();
})();
</script>
|
修改themes\fluid\layout\layout.ejs文件,找到<body>标签,在其内部第一行插入下面代码:
1
2
3
| <% if (theme.loading.enable) { %>
<%- partial('_partials/loading.ejs') %>
<% } %>
|
修改主题配置文件_config.fluid.yml,添加loading动画的配置项:
1
2
3
4
5
|
loading:
enable: true
play_time: 500
|